Table of Contents
Start Page » DEMoCap: Drag[en]gine Motion Capture » Slot placement (on character)
Slot Placement
This page contains some hints on where to best place Tracker Slots.
Always start first by resetting the Target Position by clicking on the … button next to the Target Position edit widgets and clicking on Match Actor. The Target Position is now identical with the Reference Position. Modify this position to match the character to work with.
The Reference Position is the position of the tracker slot in the Actor performing the motion to capture. This position is pre-defined by the type of the tracker slot. This position allows to transform the actual VR device tracking position into a well defined coordinate system before trying to map it. This hides the quirks of the used VR device and allows to share motion transfer configurations.
The Target Position is the position of the tracker slot in the Character to capture the motion for. The user can modify this position to make the slots line up with the particularities of each character. The individual motion transfers bind their desired outcome positions to this slot.
Separating these two positions allows to transfer motion from actors to non-matching characters. This page describes where the Target Position is best placed.
Head
There is usually no need to change the Target Position for regular characters. For characters with long necks you have to experiment with the position. As a starting point move the slot up (green arrow) until it is 80% between the head bone level and the shoulder level (hence closer to head than to shoulder). Moving into the other directions is usually not helping much. Just move the slot up and down to find an acceptable position.
Chest
There is usually no need to change the Target Position.
Waist
There is usually no need to change the Target Position.
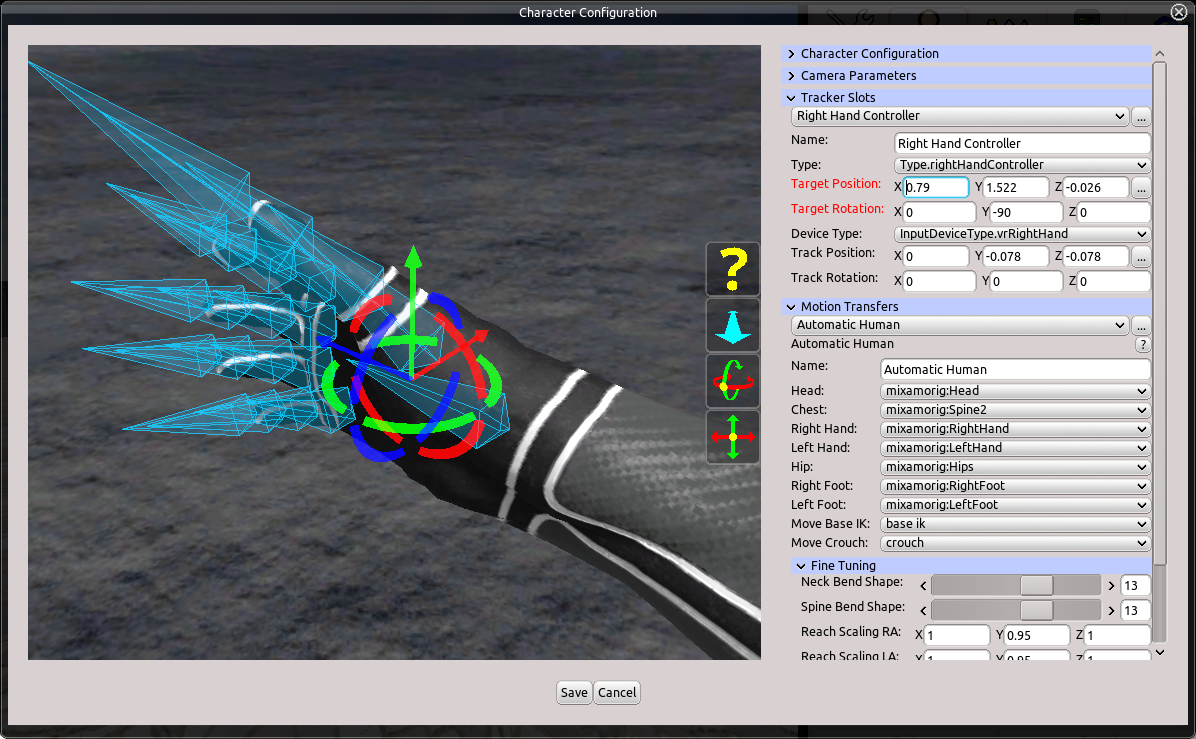
Hands
Move the Target Position to be located roughly in the center of the palm in all directions. The slot has to face towards the fingers (hence away from the character; blue arrow) while pointing forward (green arrow) towards the thumb.
Imagine the character is holding the VR device in his hands. Use the center of the grip as starting position moving into the palm (half way between top and bottom side of the palm).
By default the orientation should be correct. If the character has the hands slightly angled you can rotate the slot to make the Z axis (blue arrow) point along the fingers and the Y axis (green arrow) towards the thumb as if the character is holding the VR device.
Elbows
Move the Target Position to be located roughly in the center of the elbow joint. The exact position is not that important since IK based motion transfer uses this slot as guide to rotate the upper arm. The slot has to point into the same direction as the hand slot hence outwards (blue arrow) and up (green arrow).

Feet
The Reference Position is located at floor level. This makes placing the Target Position easier. Move the slot sidewards (red arrow until the slot is located in the center of the foot. If the character has long toes ignore the toes and use only the foot part between the toe and heel but keep closer to the toes than to the heel. Keep the level unchanged (green arrow) and move forward and backwards (blue arrow) only if the character feet are located in front or behind the actor origin location. Changing this position alters the rotation point (left/right foot twisting) and can help with rotating on your heel/toes.
Knee
The same applies as for elbows.
Evaluate
To verify the placement of the slots do a calibration and show the mirror. You can then easily see how the slot placement performs. If not performing well go back to the Character Profile dialog and apply changes. You can then re-calibrate and examine the results.
Device Recording (Advanced Use Cases)
For fine grained evaluation of the placement record an animation with Device Record enabled. To do this find in the Session group the Device Record combo box located at the right side next to the Frame Rate combo box. You can choose between 4 values:
- none: Disables device recording. This is the default
- device: Records the actual VR device location.
- reference: Records the VR device location transformed into the Reference Position.
- target: Records the VR device location transformed into the Target Position.
Using reference is recommended since this represents the starting position used for Target Position placement as outlined above.
Using device is recommended for advanced users wishing to setup low level motion transfers manually. This shows the true VR device position and allows to manually calculate positions and offsets instead of letting DEMoCap calculate these values. This is usually only useful for special setups.
If not none an additional -devices.deanim and -devices.derig file is created. The -devices.derig file contains a rig/skeleton with one root bone for each tracking device. The bone is named to match the slot name. The -devices.deanim file contains the recording of the VR devices in the respective coordinate system.
To evaluate the recorded devices use the Blender Scripts:
- Import the animation as outlined in Import Animation Into Blender.
- Import the -devices.derig file. You have now an additional Armature representing the VR setup.
- Select the created Armature
- Make sure blender is in Object Mode.
- Import the -devices.deanim file.
You can now evaluate the motion capture against the VR device positions to figure out how you can potentially improve the results.
Recording devices can also be used to modify and improve the imported animations. You can use the devices armature bones as inputs for bone constraints for example to blend game driven IK bones with motion captured devices or to fine tune IK results manually.
