Table of Contents
Start Page » Game Development with the Drag[en]gine » Drag[en]gine Integrated Game Development Environment » Sky Editor
IGDE Sky Editor
The sky editor allows to edit sky files (*.desky) for your game. Skies consist of spherical layers which can contain a background image, sky bodies (aka celestial bodies) and a sky light. Controllers can be defined to manipulate layer parameters for example to simulate day-time using a single controller. Links are used to connect controllers to layer parameters using a bezier curve.
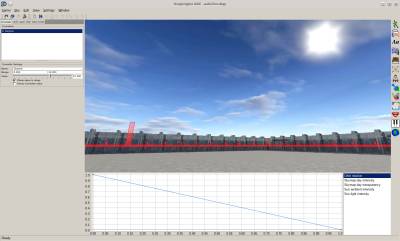
The editor window composes of the preview area and the properties panel on the left side.
Preview Window
The preview window shows the preview of the sky. Around the equator a compass like band is displayed to help orient yourself while viewing the sky. You can rotate the view using MOUSE_RIGHT.
Sky
The Bg Color parameter defines the sky background color. While rendering the background is cleared with the background color of the first rendered sky. It is possible to use multiple skies in a game world.
Controllers
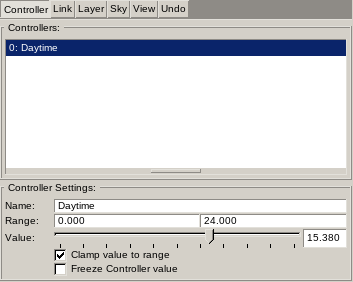
Controllers are used by game programmers to adjust the sky. In general the artist defines the controller ranges but game programmers can overrule them to make their live easier. This does not interfere with the sky production process. The output of the controller is the Value linearly mapped from the range Minimum Value → Maximum Value to the range 0 → 1.
Controllers are typically accessed by the game developer using the unique Controller Name (case sensitive). This allows to mix and match different animators with differing controller setups (count, ordering and ranges) as long as the required names are present.
The controller list is an ordered list. For this reason controllers are shown with their index number too. Game developers can use this index number as an alternative to controller names.
The Clamp value to range check box determines if the input value is clamped to the controller range or wraps around if going past the range.
The Freeze controller value is used only for preview purpose to stop a controller from updating its value dynamically.
Links
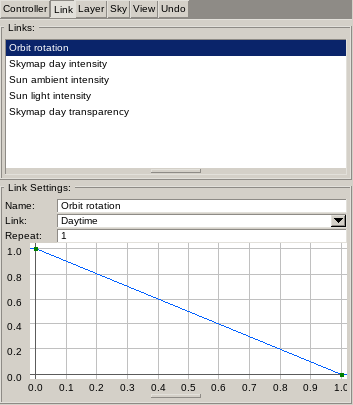
Links map controller values to layer parameter target input values using bezier curves. The artist is in full control of links. This decouples controller ranges allowing game programmers to freely manipulate them as they need.
The curve input range is 0 → 1. The curve output range is also 0 → 1. Hence using a default linear curve forwards controller output values unmodified to layer parameter target input values. See Bezier Curve Editor for usage.
Links have a unique Name used to identify them in layer parameter targets. The link list is sorted alphabetically.
The Controller value indicates which controller is used as input for the link. If no controller is assigned the link uses 0 as input value.
The Repeat value allows to repeat the curve multiple times. This is useful for jig-saw type curves which can not be done with a bezier or linear type curve. This is also useful for overlaid detail layers. There you can easily adjust their play speed relative to the main layers.
Layers
Layer Settings
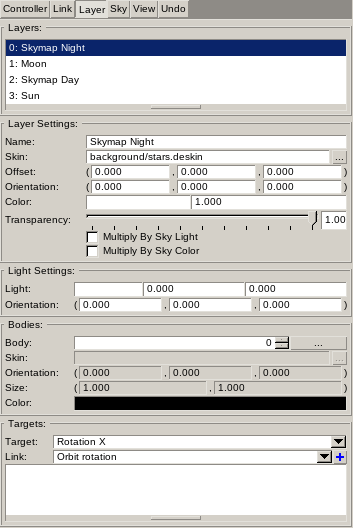
The Name is the unique name of the layer. It is for editing purpose only and not use in-game.
The Skin is the Skin resource to use as background for the layer. The first texture in the skin is used.
The Offset defines the relative offset of the layer center compared to the camera. Layers are handled as if they are spheres. Their center is always located at the camera position with the orientation matching the world orientation. For certain situations this can be bad looking for example to simulate clouds moving by. The reason is that on the earth surface we do not see the moving cloud surface as if we are at the center of the earth. To get a better result the layer center has to be moved downwards. This can be done using the offset parameter. The values are in the range -1 → 1 which represents the extreme points touching the layer surface.
The Orientation defines the orientation of the layer (layer coordinate system) relative to the world coordinate system. Controller driven rotation is applied to the layer coordinate system not the world coordinate system. Hence this parameter can be used to set an initial orientation in which the dynamic rotations can be applied.
The Color parameters define the tint color and intensity modifier. The background skin is component wise multiplied by this color scaled by intensity.
The Transparency defines the overall layer transparency. This affects the layer and sky bodies inside.
Enable Multiply by Sky Light to multiply the Intensity parameter with the total sky light intensity of all layers. This avoids the need to create complicated controller and link constructs to synchronize the background skin intensity with the sky light intensity (for example dawn/dusk light intensity).
Enable Multiply by Sky Color to multiply the Color parameter wise with the total sky light color of all layers having. This avoids the need to create complicated controller and link constructs to synchronize the background skin color with the sky light color (for example red-coloring at dusk time).
Light Settings
The Light parameters define the Sky Light Color, Sky Light Intensity and Sky Ambient Intensity. The light intensity is applied to all surfaces directly hit by the light. The ambient intensity is applied to shadow regions to simulate diffuse light scattering. The total light contribution is the light intensity plus the ambient intensity.
The Orientation defines the orientation of the light relative to the Layer Coordinate System. The orientation indicates the direction from which the light is coming.
Bodies
Layers can have one or more sky bodies. These are typically celestial bodies like the sun or the moon but can be also clouds or even planes flying by overhead. Bodies are rendered in the order they are defined. Bodies can not be modified by controllers only the layer they are attached to.
The Skin is the Skin resource to use as the body image.
The Orientation defines the orientation of the light relative to the Layer Coordinate System.
The Size defines the size of the body expressed as opening angle in degrees. Hence a value of 2 makes the body appear 2-degrees wide/high.
The Color defines the tint of the body. The skin is multiplied component wise with this color.
The Targets panel contains the list of available targets. Targets define layer parameters that can be manipulated using controllers via links. Each target can have one or more links assigned. If more than one link is assigned their output values are multiplied together. For this reason links produce output values in the range 0 → 1. If no link is present an input value of 0 is used.
View
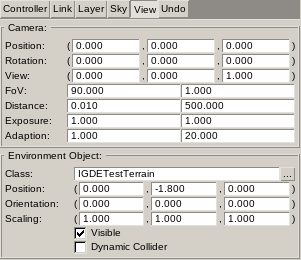
Preview and simulation parameters can be adjusted in this panel.
The Camera panel shows the parameters of the camera in the preview view. The values can be manually edited.
The Environment Object panel defines the Object Class to use as environment the sky is previewed around.

